
Getting started
From a fresh install to live quotes, charts and your first script. It takes about five minutes per terminal. If the app isn't installed yet, start with Install.
1. Set up QuoteBridge
The setup screen opens after installing. It lists every MetaTrader terminal on the computer, by the name of its installation folder, and ticks every MetaTrader 4 terminal.
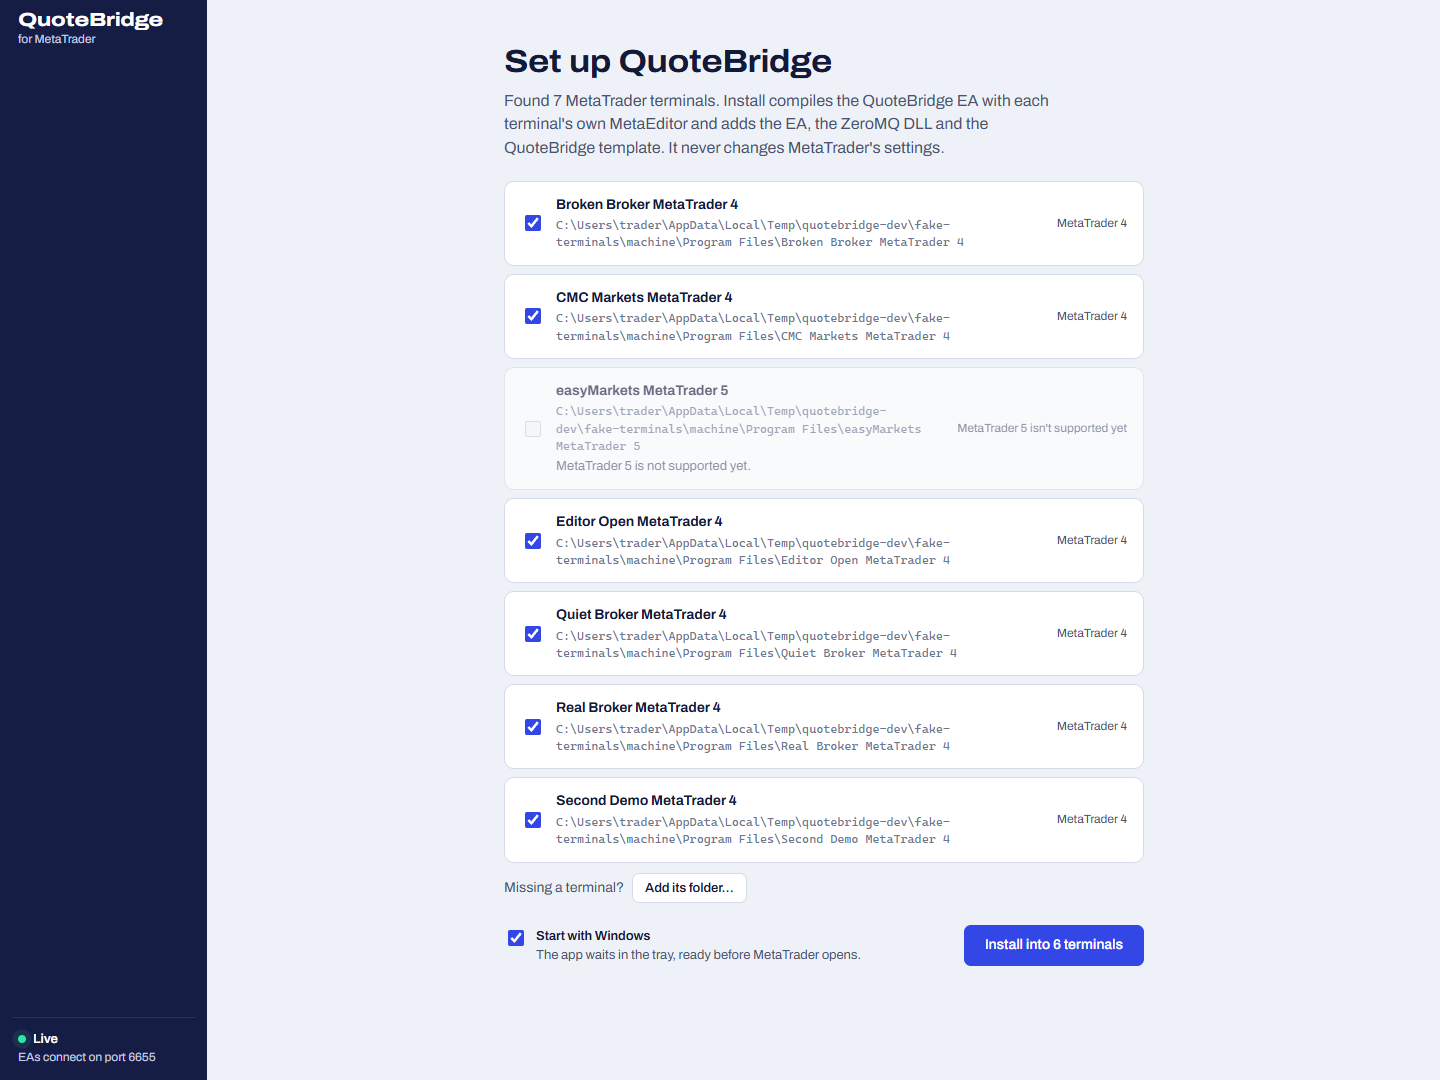
- Untick any terminal you want QuoteBridge to leave alone. You can add it later from Terminals.
- A terminal that's missing: click Add its folder… and choose its installation folder. One that runs in portable mode shows It runs in portable mode to confirm it.
- Keep Start with Windows on, so the app waits in the tray, ready before MetaTrader opens.
- Click Install. For each terminal, the app compiles the QuoteBridge EA with that terminal's own MetaEditor and
adds the EA, the ZeroMQ DLL and the QuoteBridge template. It never changes MetaTrader's settings, and never touches
default.tplor your other templates. Files from an earlier manual setup are backed up before they are replaced.
If MetaEditor is open, the app asks you to close it first, so the compile doesn't go into your open editor.
2. Connect each terminal
Three steps happen inside MetaTrader, and only you can do them. Terminals shows them as a checklist on each terminal still being set up:
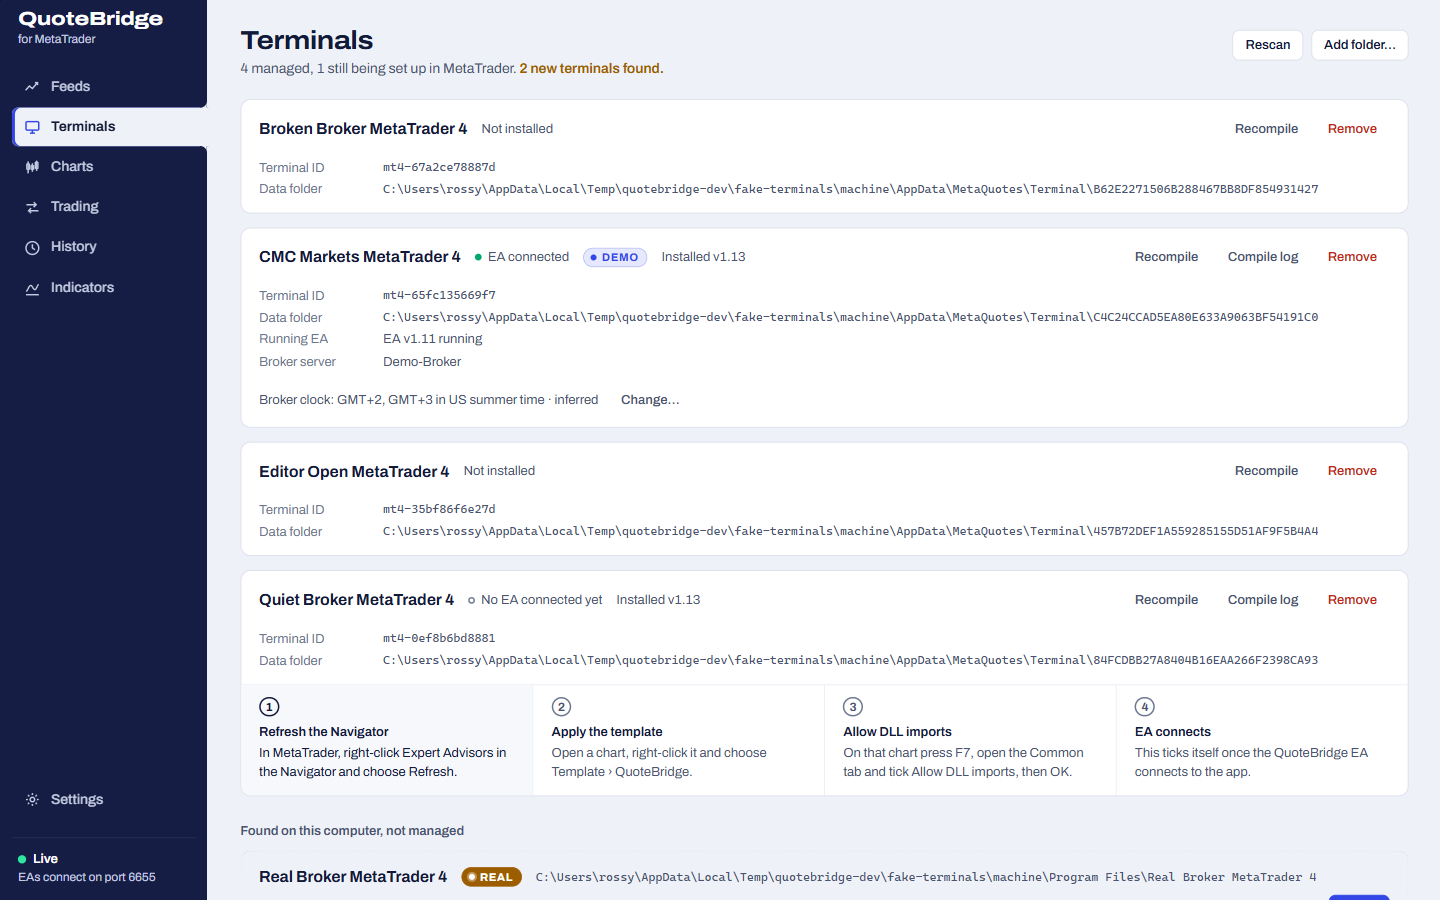
- Refresh the Navigator. In MetaTrader, right-click Expert Advisors in the Navigator and choose Refresh.
- Apply the template. Open a chart of a symbol you want, right-click it and choose Template › QuoteBridge.
- Allow DLL imports. On that chart press F7, open the Common tab, tick Allow DLL imports and click OK.
The fourth step, EA connects, ticks itself when the app hears from the EA. Apply the template to one chart per symbol you want to follow. AutoTrading is not needed for quotes.
3. Watch the feeds
Feeds lists every chart's quotes, grouped by terminal, with bid, ask, spread and quote time. The bid and ask cells flash green or red on each tick.
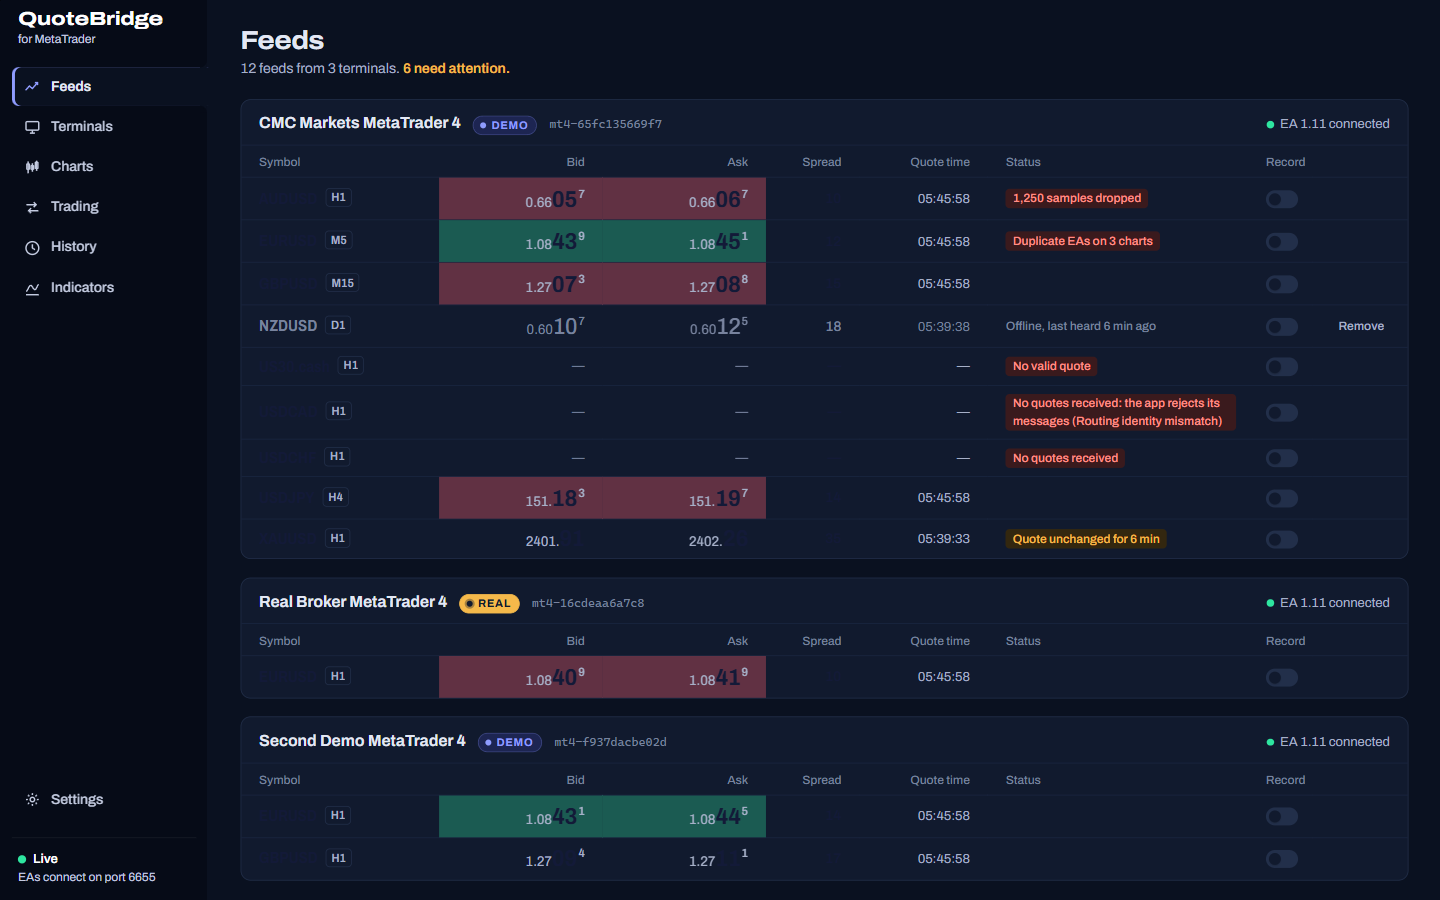
A row is flagged when something needs you:
| Flag | Meaning |
|---|---|
| Quote unchanged for … | The quote hasn't moved for a while: the market may be closed, or the feed stalled. |
| No valid quote | The EA can't read a price for this symbol. |
| Duplicate EAs on N charts | Several charts send the same feed; remove the EA from all but one. |
| N samples dropped | The EA dropped quotes, for example while the app wasn't running. |
| Offline, last heard … | The chart's EA disconnected. Remove takes an old feed off the list. |
Closing the window hides the app to the tray; quotes keep flowing. Use Quit in the tray menu to stop it.
4. Open a chart
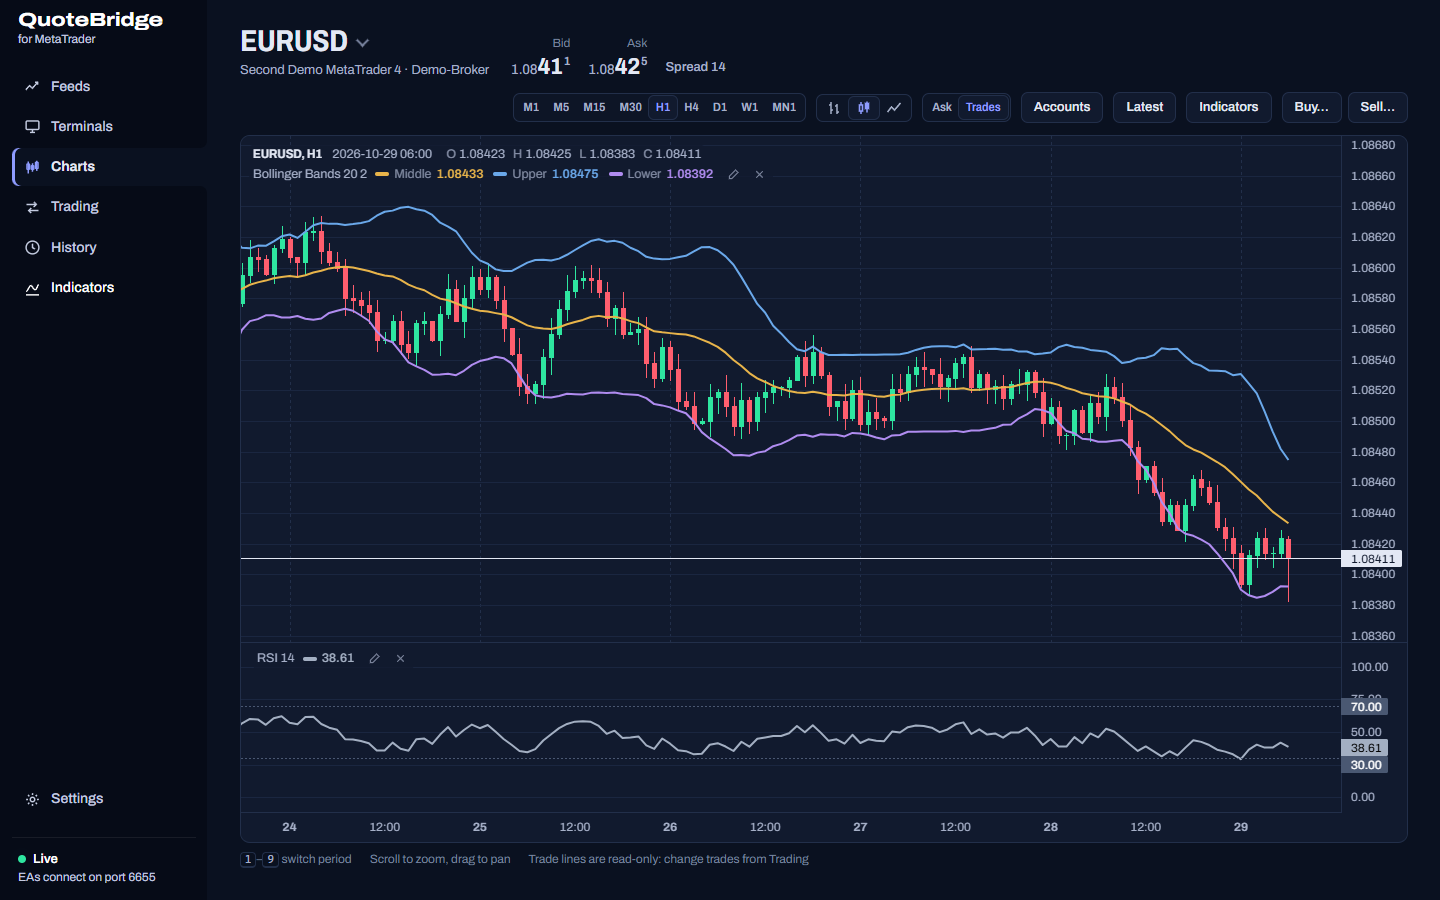
Charts draws any feed with MetaTrader's periods (M1 to MN1, keys 1–9), as candles, bars or a line. It opens with the last 900 bars of the terminal's own history file, joins today's live candles onto the end, and loads more as you scroll back. Add indicators from the Indicators menu; each has its own legend row and, where it needs one, its own pane.
5. Record and keep history
- Turn on Record on a Feeds row to store every quote of that market (broker server + symbol), from whichever terminals supply it. Settings › Recording lists what is recorded, with Stop and Delete.
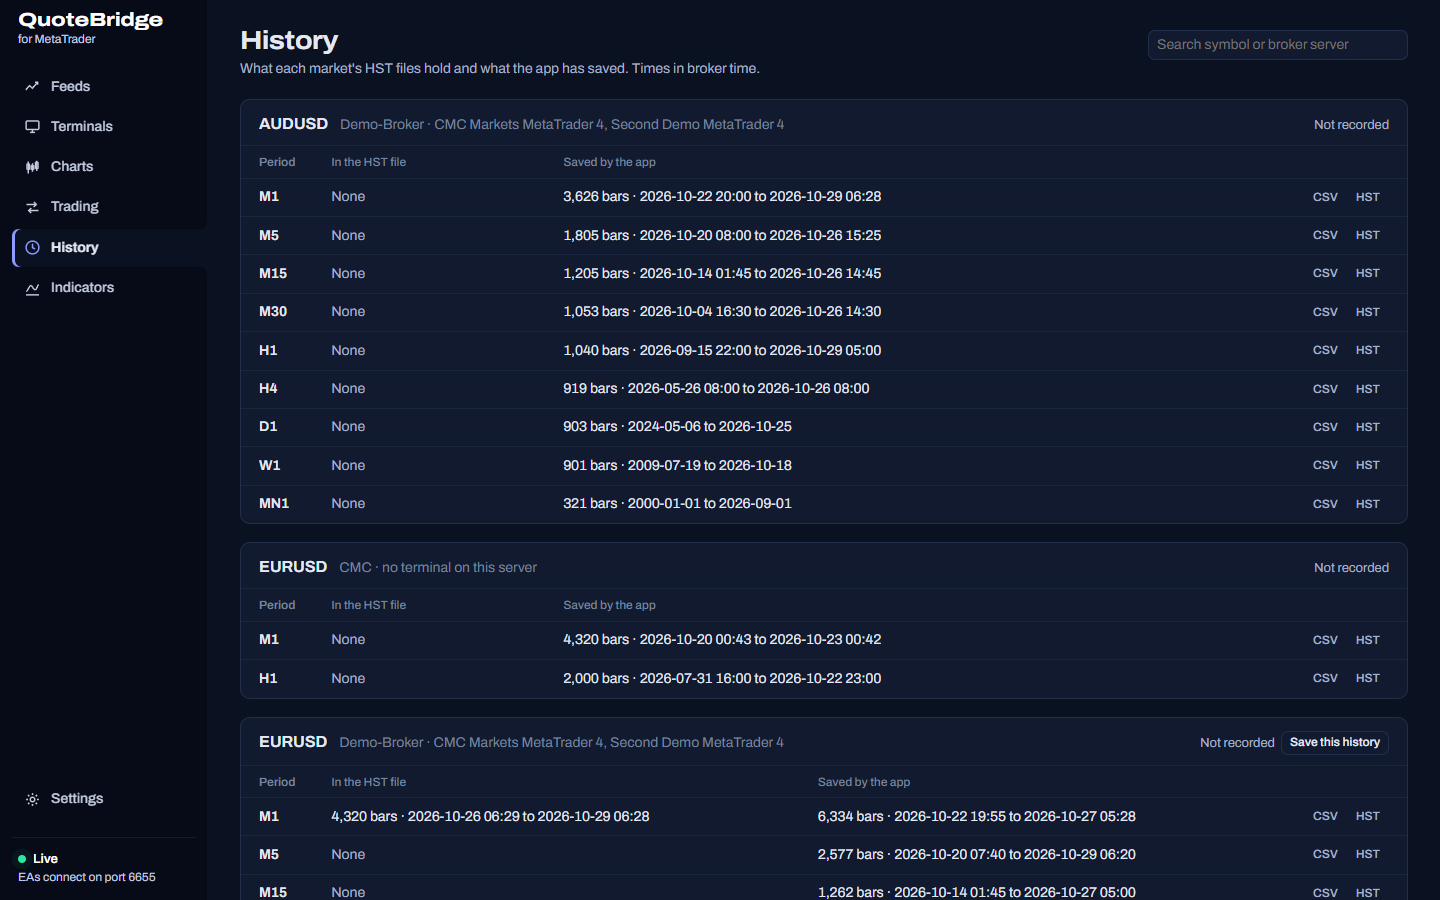
- History lists each market's periods, with what the terminal's HST file holds and what the app has saved. The app keeps its own copy of the bars, so history survives MetaTrader trimming its files. Download any period as CSV or HST.
6. Add your own indicators
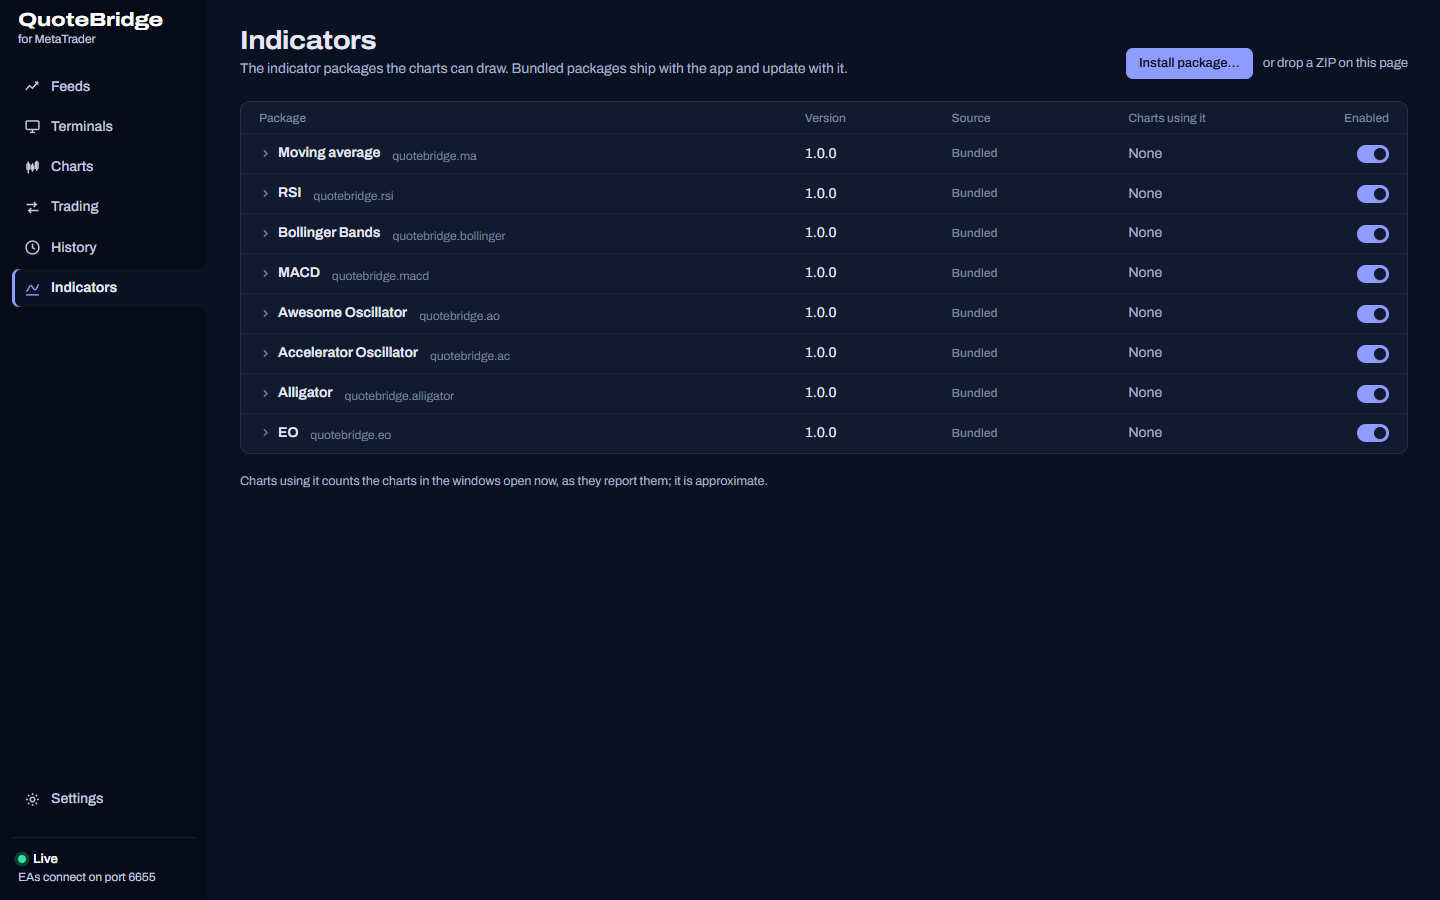
Indicators lists the eight bundled packages and any you install. Install package… (or dropping a ZIP on the page) adds your own. To write one, or convert an MT4 indicator, see Indicator packages.
7. Trade on demo and real accounts (optional)
QuoteBridge trades on both demo and real accounts.
- Demo accounts can trade from any of their charts, with no EA input to set: just turn on AutoTrading in MetaTrader. Switch on Demo trading in the app window's Settings › Trading before your first order.
- Real-account trading is off by default. A real account stays read-only until you enable it in two places:
On exactly one chart of the account, press F7, open Inputs and set
EnableRealTradingtotrue: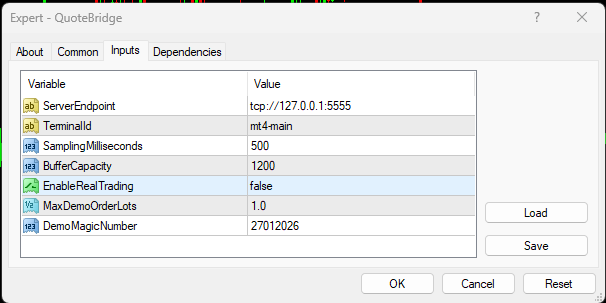
In the app window, switch on Real-account trading in Settings › Trading and confirm its risks.
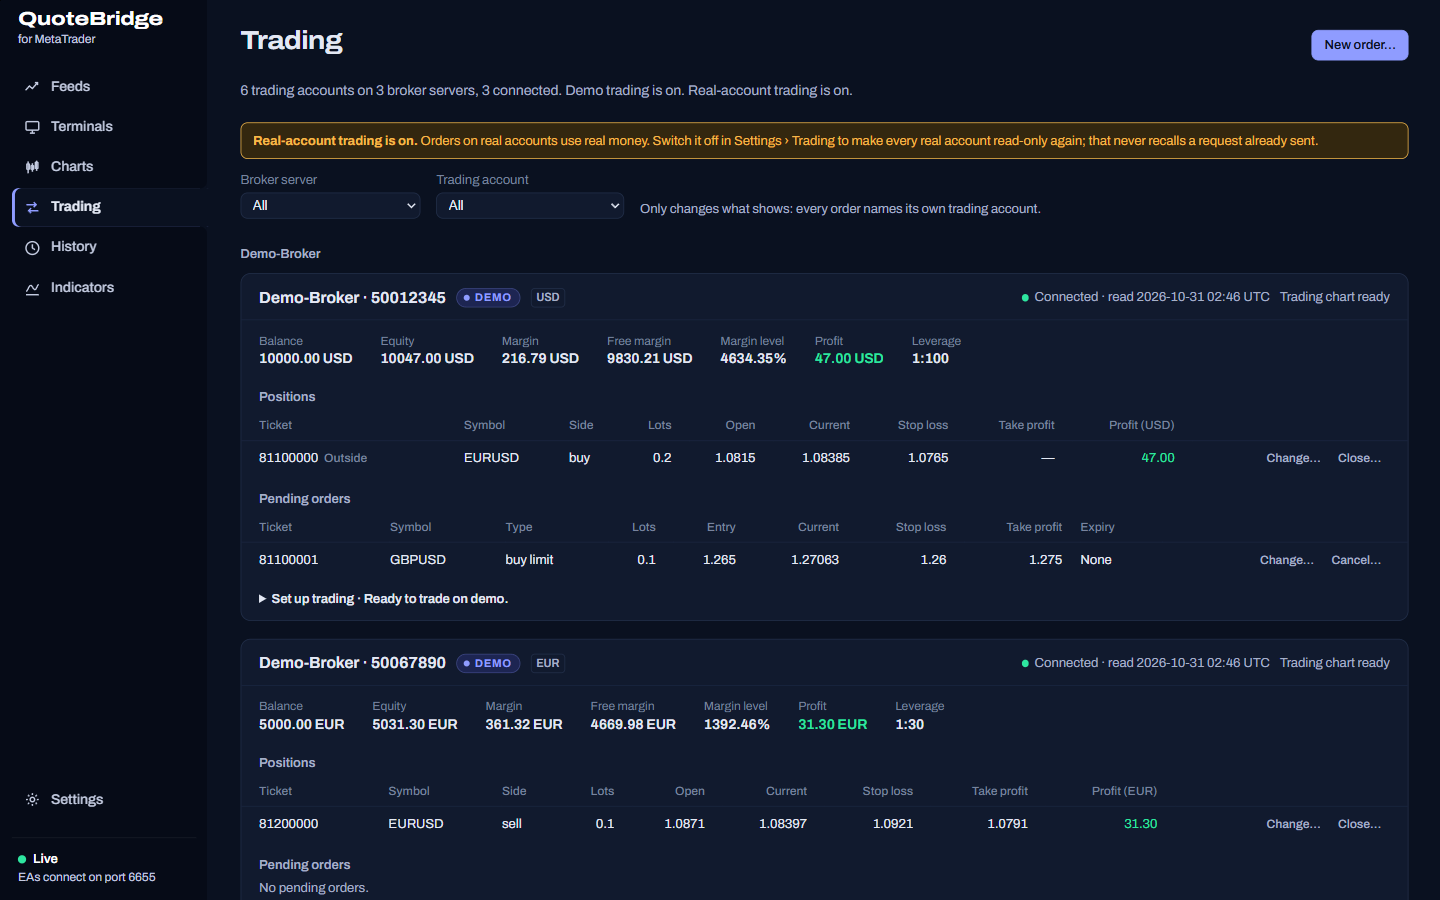
Trading explains every gate, and the Trading page the view.
8. Use it from scripts and agents
In the app window, open Settings › API keys and create a key:
readonlyto read,traderto also take screenshots and preview and execute trades. The key is shown once.REST API. Call the REST API on
http://127.0.0.1:5580/api/v1withAuthorization: Bearer <key>.CLI. The command-line client
mt4-quote-bridge(mt4-quote-bridge-cli on GitHub) needs Node.js 22.12 or later. Install it with npm:npm pack github:ross-jill-ws/mt4-quote-bridge-cli npm install --global ./mt4-quote-bridge-cli-<version>.tgzThen sign in and try it:
mt4-quote-bridge auth server       # accept the default http://127.0.0.1:5580
mt4-quote-bridge auth login        # enter your API key
mt4-quote-bridge accounts list
mt4-quote-bridge markets list
mt4-quote-bridge markets quote XAUUSD --broker EasyForex-Demo
Use your own broker server and symbol in the last line. Every command and subcommand has
--help; the full list is in Command-line client.To use it from a bot app such as Grok Bot, Muse or Dots, which cannot reach
127.0.0.1on your PC, open an ngrok tunnel to the app and give the bot its address: see Use it from another computer with ngrok. AI agents and remote access covers adding the CLI's skill to an agent and what to ask.
Next
- Terminals and feed identity: upgrades and portable terminals.
- Install: updating and uninstalling.
- User manual: everything else.
This page is docs/getting-started.md in the app's repository.View on GitHub